
New York - Munich - Portland - San Francisco - Seattle - Stockholm - Vancouver - Zurich
New York -
Munich - Portland - San Francisco - Seattle - Stockholm - Vancouver
- Zurich
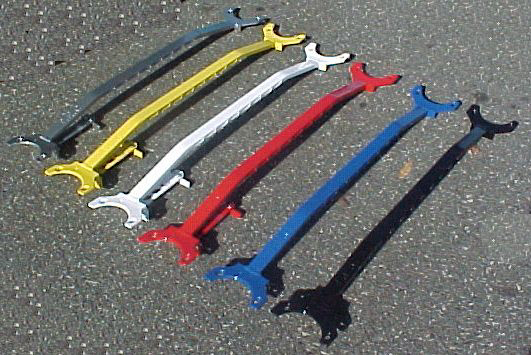
(Front Strut Tower Bar for the SOHC Stealth or 3000GT)
"How-To" by Bob Forrest
![]()
Introduction
Strut towers are designed mainly to handle the vertical forces
imposed by the struts (AKA "shocks"), and on the Stealth and 3000GT, they are particularly
solid. But although the towers are adequate to handle normal horizontal forces,
the stresses of racing (or even repeated travel over rough roads) will eventually weaken them. A
strut tower bar connects the two strut towers, enabling them to share in any such horizontal stresses.
In addition to extending the life of the towers, the benefit that's most important to those of us who race
is the more controlled handling that a tower brace provides. |
![]()
Necessary Tools
|
|
Torque wrench; 14mm socket. |
|
|
1/4" Ratcheting Socket wrench. |
|
|
7/16" Socket, 11/32" Socket for 1/4" Ratchet, above. |
|
|
Extension and swivel for 1/4" Ratchet, above. |
|
|
10mm Box End Wrench. |
|
|
Fender blanket or heavy towel to protect your car. |
![]()
Preparation
|
|
The only prep you will really have to do is to select a replacement battery that is small enough to fit under the tie-down bracket that comes with the TEC Front Strut Tower Bar. Choose a battery with maximum dimensions (not including the terminals) of 6.75"H x 6.813"W x 9.75"L. |
|
|
Depending on the height of the battery, you may have to fashion some kind of platform on which to place the battery, to bring it up to the proper height to be held securely by the bracket. Do the math and figure it out in advance. |
![]()
Procedure
{ Click any of the images below to see a larger version. }
|
|
|
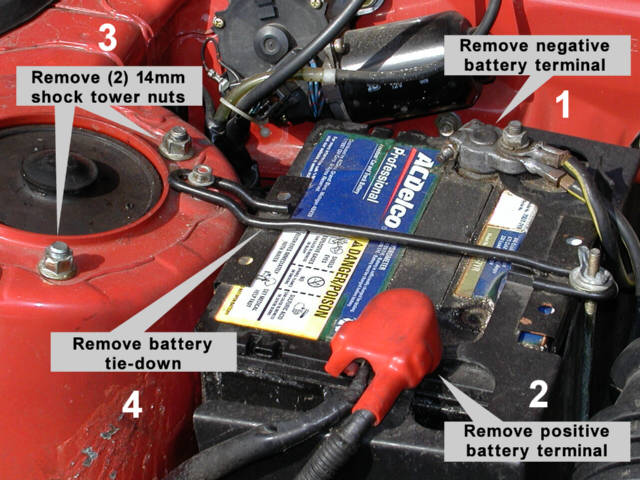
1. Remove the negative battery terminal. |
|
|
|
5. Remove the old battery and replace it with a smaller one, as per the size restrictions
above. If your calculations suggest that it's necessary, place the platform you've
chosen beneath the battery. |
|
|
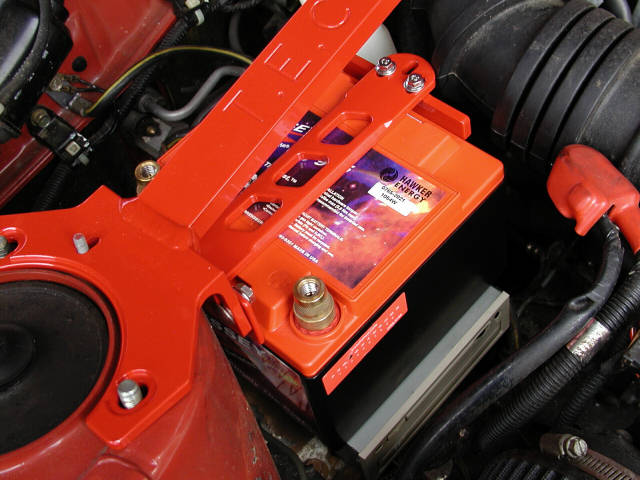
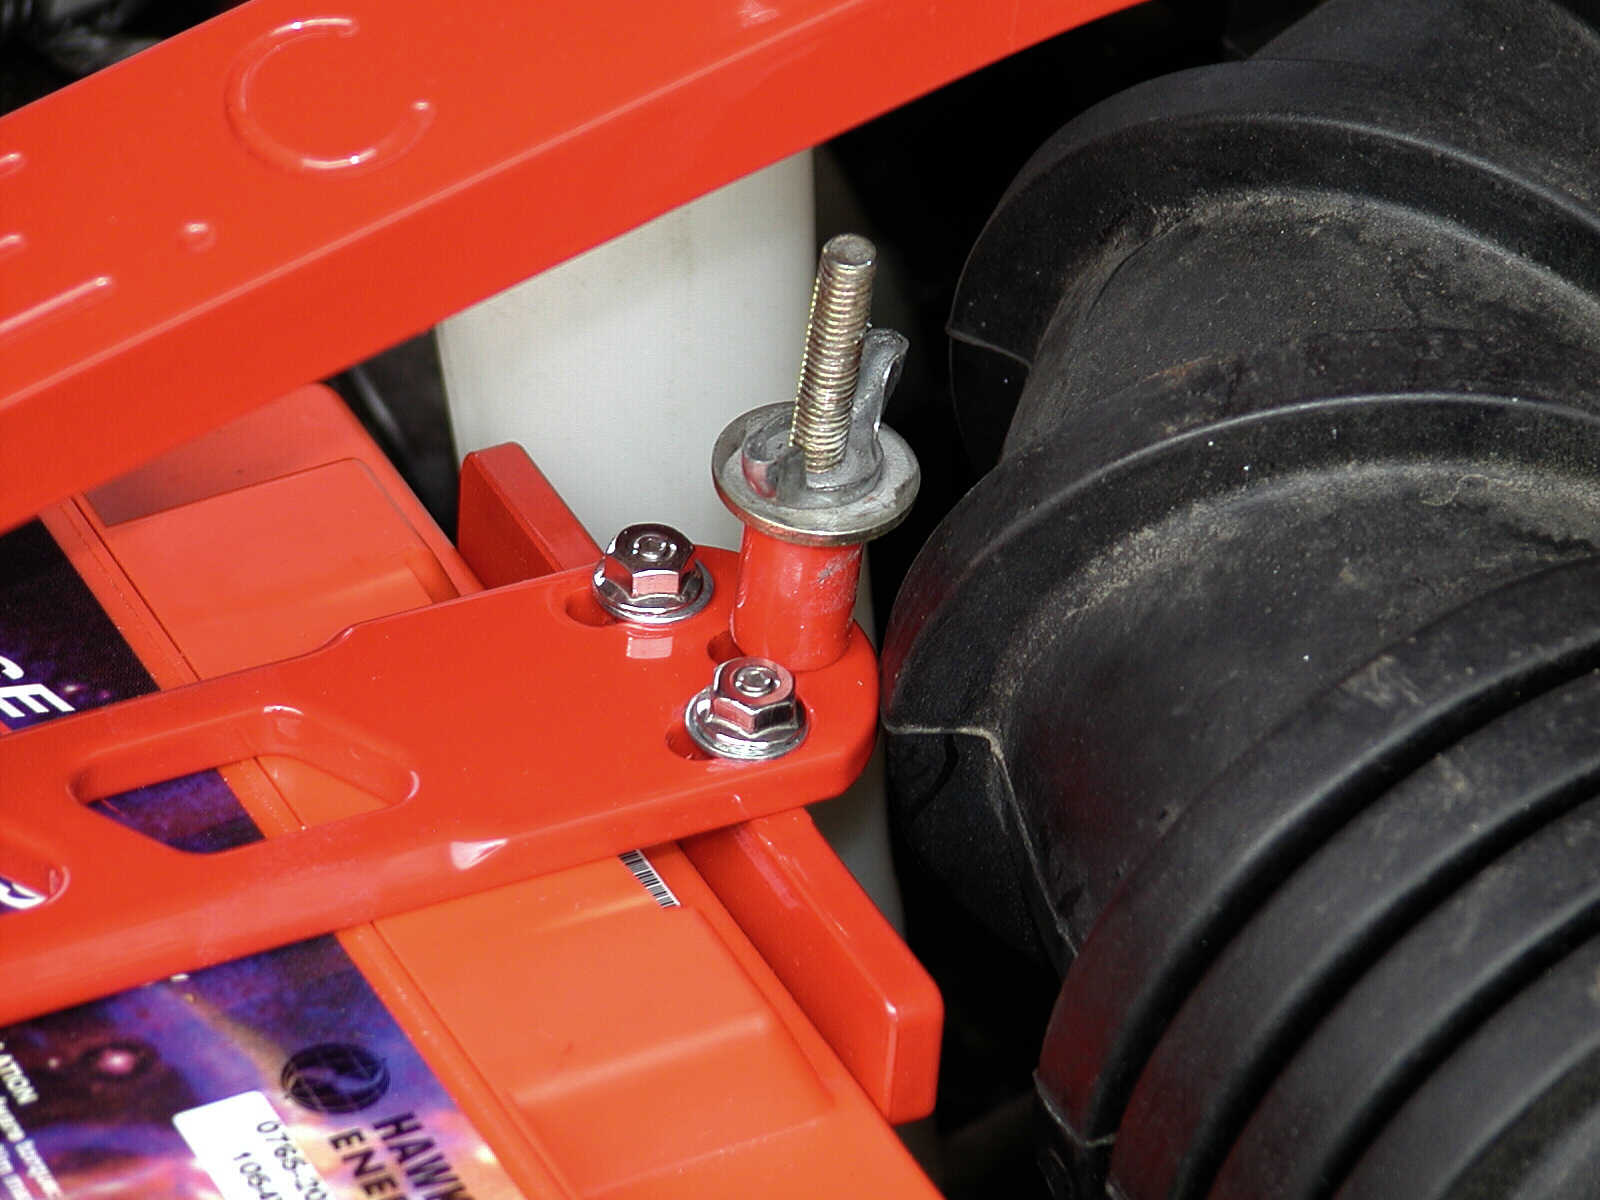
7. And here is the battery, all snug in it's bracket. The 1" x 3/8" (color-coordinated!) spacer has been placed on the J-bolt; this spacer is necessary, since the threads end just below the wingnut. Please note that all bracket fasteners should be only just barely hand-tight until the strut bar is fully tightened. Check the strut bar to make sure it's centered, then alternately torque the four 14mm nuts to 33lbs. Now you may tighten all the battery hold-down bracket fasteners the rest of the way. |
|
![]()
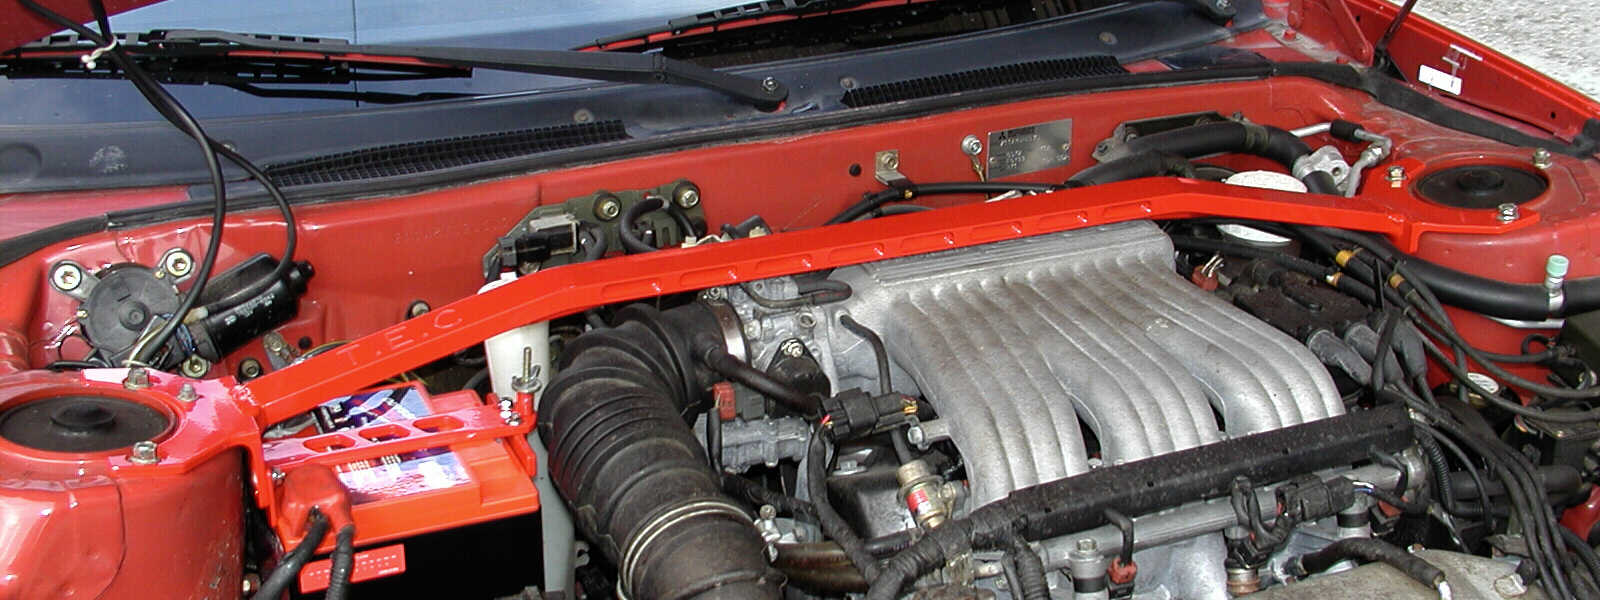
Congratulations! You're done! |
Here's a photo of the completed installation. Now that wasn't too hard, was it? If you've followed this guide exactly, (well..., without duplicating my miscalculation, hopefully), you have probably just completed the whole installation in under an half-hour. Your car is safer, stronger, and will handle better during extreme steering maneuvers. And you have the satisfaction of knowing that it was done right. You undoubtedly saved about $100 in labor charges, too! |
![]()
Product Evaluation
|
|
The TEC Performance Front Strut Tower Bar is every bit as solid as they claim. It is well-made, impeccably finished in a thick powdercoating, and is incredibly easy to install, even by someone with only minimal skills. |
|
|
The improvement in high-speed handling is substantial. Cornering is smoother, with less "dip" in the hardest turns. Body-flex is reduced significantly, as well. Previously, when I would enter a raised driveway, for example, or go up on a berm during racing, you could actually hear the car "creak" a bit, as the entire frame twisted slightly. By coupling the front towers, a more rigid engine "cage" is created apparently. The car definitely feels more solid. |
|
|
The only negative comment that I have is regarding the claim on the 3SXPerformance website, that "The end pieces not only attach with the strut bolts, but angle down to rest against the strut frame/body itself". On my car, at least, they do not. The passenger side of the bar has the angle piece just barely touching the tower, while on the driver's side, it does not touch at all. I would have liked the fit to be perfect. Oh, well, we'll see what the folks at 3SXP have to say... |
![]()
Questions about your car???
Ask the other owners--
On our FREE mailing list!
Click HERE
![]()

Article & Images ©1995-2004 Bob Forrest, All Rights Reserved.


