Introduction:
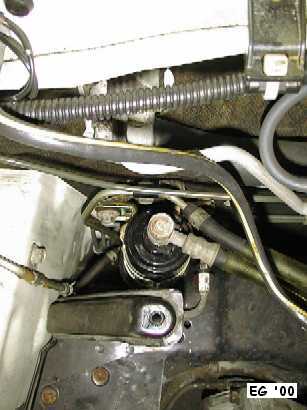
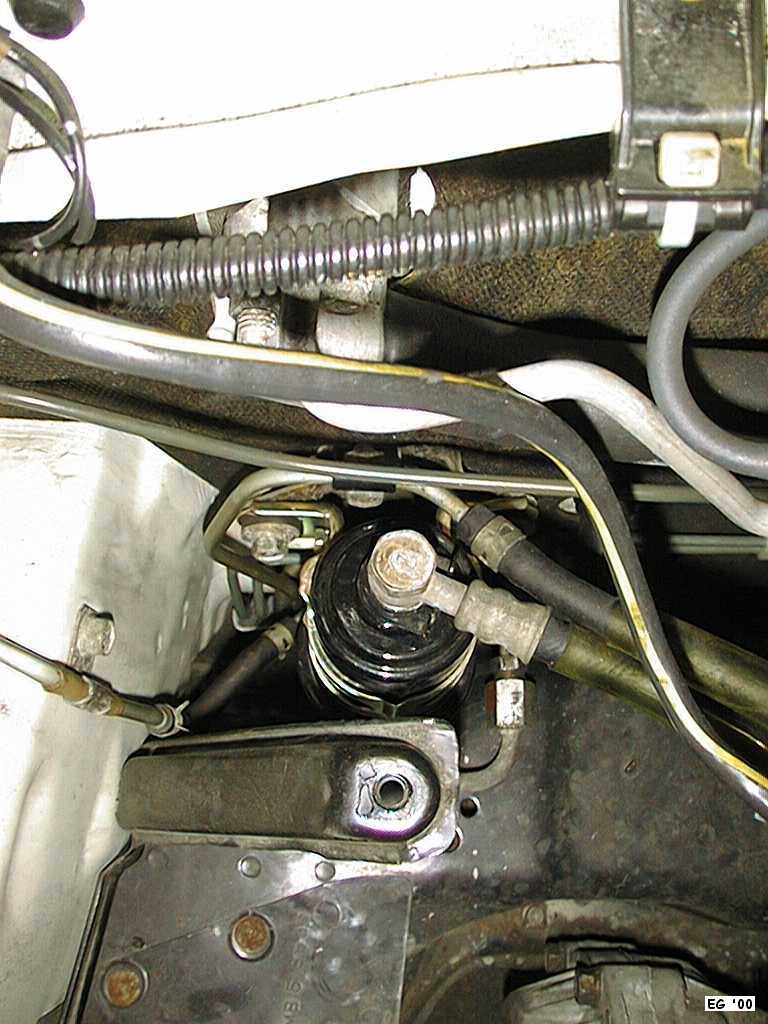
 Your mission, should you choose to accept it, is to
locate the elusive 3/S fuel filter (left), disconnect and remove it from the
vehicle, and install a replacement filter. You should not be particularly fond
of the skin on your knuckles, as you will most likely lose some of
it.
Your mission, should you choose to accept it, is to
locate the elusive 3/S fuel filter (left), disconnect and remove it from the
vehicle, and install a replacement filter. You should not be particularly fond
of the skin on your knuckles, as you will most likely lose some of
it.
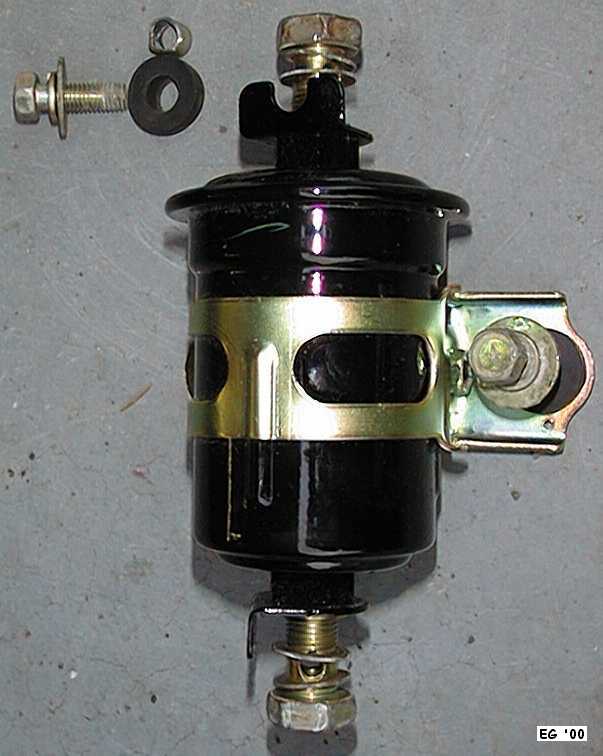
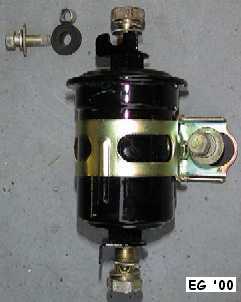
The fuel filter, when disassembled, looks like the picture on the
right.

Things you'll need:
|
 |
(1) New Fuel Filter (MB658136 - $25.00) |
|
(2) 3/4 inch Wrenches (19mm will also work) |
|
(1) Socket Wrench (speed wrench is nice) |
|
Misc. small metric sockets (8mm, 10m, 12mm, etc) |
|
Shop towels to absorb any fuel that leaks/sprays out |
|
Safety Goggles |
|
Latex Gloves (if you don't like your hands smelling like gasoline) |
The Procedure:
1. Remove Residual Pressure from Fuel Lines (Optional)
|
Some would say this is an optional step - I've done it both ways
without incident. It's definitely safer to take the extra time to do this step. |
|
Remove the fuel pump access panel in the trunk (right-hand side of spare tire).
It has four screws and simply lifts up. |
|
Disconnect the fuel pump wire harness connector. |
|
Start the engine and after it stops by itself, turn the key off. |
|
Reconnect the fuel pump wire harness connector. |
|
Reinstall fuel pump access panel. |
2. Remove the Battery Terminal Connections and the Battery Tie-down Bar
|
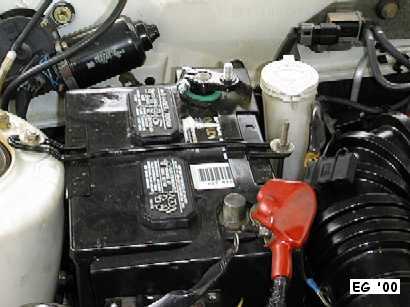
Remove the wire connections and place the wires out of the way.
Completely remove the battery tie-down bar so that the battery can be removed.
|
3. Remove Battery
|
Carefully lift the battery out of the car and
place it in a safe place out of the way.
|
4. Remove Battery Tray and Washer Fluid Reservoir
|
Remove the four bolts at the corners of the
battery tray so that you can lift it out of the way. You may leave the two
more central bolts attached as they attach the washer fluid reservoir to the
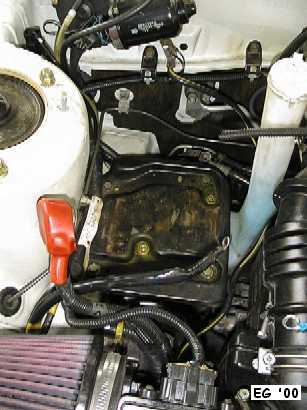
battery tray. See previous picture for bolt locations. As you will see, the
washer fluid reservoir has hoses attached to it, so if you want to save some
time, simply place the washer fluid reservoir and battery tray assembly out of
the way. Be careful not to scratch the paint on your fender if you do this!
You will now be able to see the fuel filter on the firewall behind where the
battery was.
|
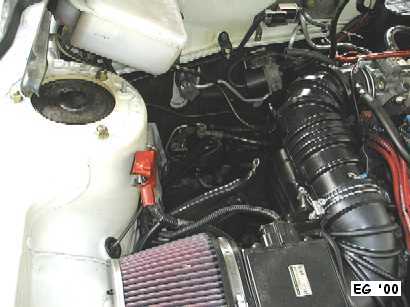
5. Remove the Intake Pipe
|

You may be able to change the fuel filter without
this step, but you'll value any extra working space you can get! You only need
to remove the portion of the pipe that extends from the throttle body to the
first joint (near the MAS). For turbo cars, I believe you'd be removing the
y-pipe instead of the pictured pipe. Be sure to remove the PCV hose when you
remove the pipe (it's the little 3/8" ID hose that goes from the rear valve
cover to the nipple on the intake pipe).
|
6. Remove Lower Fuel Pipe Connection
|
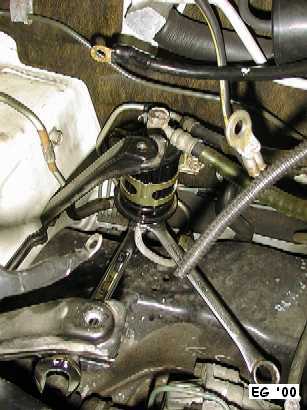
The service manual says to remove the "U"
shaped pipe that turns the fuel line around when it leaves the filter(toward
the front of the car) and heads back toward the main fuel line. I could not
loosen that fitting for the life of me. I ended up removing the bottom bolt on
the fuel filter without removing the pipe, just had to be careful not to lose
the gaskets.
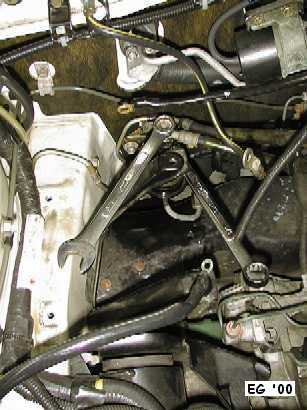
Have your safety goggles on at this point, and
place some shop towels around/below the filter so that any gasoline that
sprays/leaks out will not go everywhere.
This is where the fun
starts! Be sure you're turning the bolt the correct way (remember, it's upside
down). You'll need two wrenches (3/4") If you don't have two 3/4" wrenches, a
19mm and a 3/4" will work. Use the closed end on the bolt and grab the neck of
the fuel filter with the open end of the other wrench. There's no room for a
breaker bar in there, so you make sure you ate your Wheaties this morning. You
will probably bleed after this step... and don't lose those 2 metal gaskets
that go around the fuel connection!
|
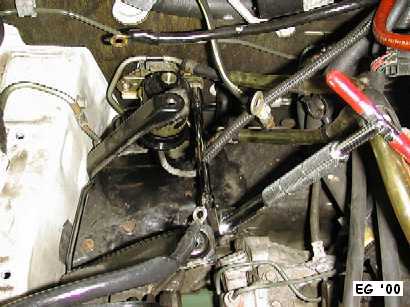
7. Remove Upper Fuel Pipe Connection
|
When you've made it this far, it's all downhill
from here. Thankfully, the upper connection is much easier than the lower one!
Remove the upper fuel connection the same way you did the lower one, and
remember those gaskets!
|
8. Remove the Fuel Filter
|
Remove the two bolts that hold the fuel filter
bracket to the firewall. After they are removed, the you will be able to
remove the filter (finally!)
|
9. Remove Rubber Grommets from Old Filter
|
Remove the rubber
grommets and the metal inserts (see fuel filter picture at top) from the old
filter bracket.
|
10. Repeat the Previous Steps in Reverse Order (to install new
filter)
|
Remember the gaskets that surround the fuel fittings at the top
and bottom of the filter.
|
11. Clean Up Any Mess You Made
|
Make sure you wipe up any gasoline that dripped under the car.
|
12. Start the Car
13. Check For Fuel Leaks
Questions about your car???
Ask the other owners--
On our FREE mailing list!
Click HERE

Team3S FAQ Page
Team3S HOME
Article and "How-To" Images © 2000-2004 Erik Gross, All Rights Reserved.
Other Images © 1995-2004 Bob Forrest, All Rights Reserved.